When it comes to the iPad, we in Sussex TEL usually write and publish blog posts concerning new and exciting apps, methods of recording video and ways of using the iPad in teaching and learning.
However, we have recently realised that, whilst all these things are great and useful to many, we may have missed out the step of getting started with the iPad, which is where others may be.
We hope that this blog post, coupled with the ‘Getting started with your iPad’ workshop we are delivering on 27th March 2015, will reach anyone who has been left in iPad purgatory and needs a helping hand.
Back to Basics
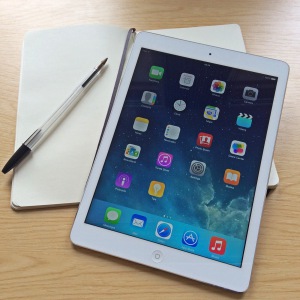
Let’s start from the very beginning. The diagram below shows a labelled diagram of an iPad Air (other versions of the iPad may differ from the this but generally they’re similar).
The main on/off button is situated above the top right hand corner of the iPad (if you’re holding the iPad so that the home button is at the bottom). As shown, the iPad itself has very few buttons as the main surface is touch screen.
Once you have turned your iPad on, you can either put it on standby (sleep) by tapping this button, or turn it off completely by holding it down and swiping right on the display when prompted.
Other functions on the exterior of the iPad are:
- Two microphones, suited to recording clearer sound from different directions
- Two volume buttons to increase/decrease the volume of any audio coming out of the device and a separate button to silence
- Built in speakers or a headphone jack for outgoing audio
- Camera on either side of the device
- Front camera – photo/filming yourself, useful for video calls and skype
- Back camera – photo/filming in front of you and seeing image on the screen at the same time
- The home button also has a few functions, mainly for activating or returning to the home screen
- press: wake up the device or exit an app
- hold: voice activated personal assistant, SIRI.
- double tap: opens the multitasking menu and displays recently used applications
Handy Gestures

creative commons licensed (BY-NC) flickr photo by Scott Robbin
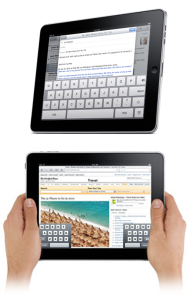
Have you ever felt that your keyboard takes up too much of the screen? One handy iPad gesture is the ability tosplit the keyboard. To do this, take two fingers and place them in the middle of the keyboard. Now pull the keyboard apart by swiping your fingers in opposite directions. To put the keyboard back together, just press down on both sides of the keyboard and swipe your fingers back together again.
Another helpful gesture is to return to the home without pressing the home button. To do this, just pinch down on the display with five fingers.
This video demonstrates these gesture controls and a couple more which help use the multitasking menu.
Mind the App!
One question that comes up regularly is “what exactly is an app?”
Well, an app is a software application designed to fulfill a specific purpose. The best way to discover what apps are is to start downloading and using them. You can do this by going to the App store (icon below) on your home screen. From here, you can see new and popular apps as well as apps you have previously downloaded.
In the top right hand corner you can search for an app. Once you have found the app you want you can download it by clicking ‘Get’ if it is free, or clicking on the price (if the app has a cost attached to it). Once you have downloaded the app it will then appear on your home screen.
The TEL website provides an A-Z list of app recommendations.
At home with your iPad
You’ll notice that once you start downloading more and more apps, your iPad home screen will start to look very cluttered.
Fear not, you can organise your home screen to make it easier to find your favourite apps. Simply press and hold your finger down on top of the logo of the app that you wish to move until all apps start to shake. Now, you can either:
- move an app to a different location on your home screen
- place onto the ‘dock’ menu (on the bottom of the screen)
- drag and drop it on top of another app to create folders. Once you’ve created a folder you can add more apps to it by dragging them into the folder too
You can watch a short video to see how you can create folders for your apps here:
Using an iPad for research?
Fiona Macneill, Learning Technologies Adviser at Brighton University, recently wrote a post to help academics explore their iPad device in relation to research activity. Read Fiona’s post ‘Using an iPad for research’ for the answers to questions including:
- can I use the iPad to record interviews and focus groups?
- which apps do you recommend using?
- speech to text apps, tripods for your iPads, what keyboard case to get.
Join US
If you want to find out more tips and tricks for using your iPad, we offer an entry-level workshop for anyone who has an iPad but is struggling to get to grips with it.
Book onto our next workshop on the 27th March 2015 at 12:30-13:30.
Your liaison Learning Technologist can also help you with any aspect of the iPad or technology use in your teaching.


[…] Read the full story by University of Sussex Technology Enhanced Learning Blog […]