


creative commons licensed (BY) flickr photo by brainblogger
We often hear podcasts and screencasts discussed as learning resources, but what exactly are they? And how can you create them?
A podcast is an audio file that can be downloaded and listened to as and when individual listeners would like. A screencast is a recording of your computer screen which is usually accompanied by audio narration or captioning.
Take a look at some of the example podcasts suggested in our blog post ‘Learning on the move? Make the most of your commute?’, or view this screencasting example to see how the TEL team have used screencasting to create a learning resource for Poll Everywhere.
Resources for teaching and learning
Podcasts and screencasts can be extremely valuable and rich resources for teaching and learning. Increasingly, we are seeing them used to flip the classroom.
In the flipped learning process, the content that would usually be delivered during a lecture is instead presented to students outside of class time, for example in the form of a screencast presentation with audio narration over the top.
In addition to this, podcasts and screencasts can be used in the event of unexpected cancellations such as snow days, as suggested in our post ‘Let it snow! Online options to beat the winter’. These resources are also useful when providing students with additional revision materials that can be accessed and used in their own time.
Student cast
As well as creating resources for your students, screencasting and podcasting could be used in learning activities where students make their own resources. You could record entries for a learning diary exercise for example, allowing students to document the stages of their learning in an alternative medium. This would also equip students with additional skills, for example both digital and communication skills. Screencasting and podcasting tools could also be used to help promote your research, to provide answers to commonly asked questions or procedures for example how to find a particular video, or to give students audio visual feedback.
We’ve picked out a selection of free, easily available tools to get you started:
Tools for podcasting
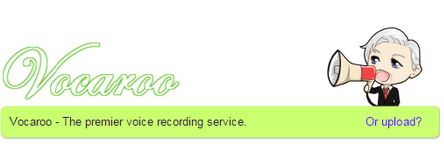
This tool is really easy to use and is browser based so there is no need to download anything. Simply click the record button and get started. After you have finished you can choose to share your file via social media, use the embed code to put your recording on a blog or website, or download your file to your computer ready to upload to Study Direct.
This is another simple tool, again browser based. Like Vocaroo, all you have to do is click to record your sound. Clyp.it will then provide you with a short link which you can share via social media, send in an email or post on your Study Direct site. iOS and Android apps are also available.
This tool is available to download in the software centre on University of Sussex computers. Slightly more  complex than the previous tools, Audacity allows you to edit your recordings within the programme. Your recording is then available to export as many different file types including MP3 and WAV, this file could again be made available on your Study Direct site.
Tools for screencasting
This screencasting tool is a Google Chrome add-on so no need for admin rights on your computer. A free account allows you to record 10 mins at a time, however if you want longer recordings use the YouTube video editor to edit your clips together. Screencastify allows you to save your file to your computer, Google Drive or export straight to YouTube as a public, private or unlisted video, whichever you prefer.
Similar to Screencastify, this tool does not need to be downloaded. Screencast-o-matic lets you select the area of your screen that you want to record or choose full screen. A free account gives you 15 minutes per recording, again use the YouTube video editor should you want longer recordings. Once happy with your screencast you can save it as a file to your computer or export straight to YouTube.
TEL’s top tips
- Test the quality of your microphone and consider background noise
- When screencasting make sure to prepare your computer desktop – close your email and hide any confidential or sensitive information
- Create a plan (a transcript may be useful especially if you are going to provide one to make your resource more accessible)
- Try not to make your recording too long; if you need a longer podcast or screencast consider breaking it up into manageable sections
- Check the screen resolution; usually you will want your screencast to be 1280 x 720, the size of a standard YouTube video
If you would like help with podcasting and screencasting, please get in touch with your school Learning Technologist for support.

[…] Read the full story by University of Sussex Technology Enhanced Learning Blog […]