Keith Smyth is a Professor of Pedagogy and Head of the Learning and Teaching Academy at the University of the Highlands and Islands.
Keith visited sunny Sussex for our Summer South Coast Meet Up event in July. In this show Kitty and Paolo caught up with Keith at the event and talked about his book, digital transformation, digital skills and much more.
Academics at the University of Sussex have been finding innovative ways to best support student achievement through the use of technology. In the past couple of years, members of the Technology Enhanced Learning team have been building a list of case studies of tutors who are using technology to improve the student experience. In this blog post we will be sharing a short synopsis of some of these case studies that might inspire you. Could your teaching or assessment practices be made more effective or efficient with the help of easy-to-use technology?
Sussex Innovations in teaching
Mind maps are one way of encouraging students to organise their thinking and make coherent disciplinary arguments. Dr Karis Jade Petty (Anthropology) employs a student-led approach to her workshops using the interactive whiteboards to produce mind maps of the ideas which emerge through class discussions. The mind maps help the class collect ideas from the student-led discussions and visualise conceptual relationships.
Other Sussex tutors are increasingly using the online board, Padlet, in order for students to post ideas and share resources. Dr Susann Wiedlitzka (Law) developed a new module that made the most of technology in her curriculum design. In one of her modules she expects students to post ideas about the topic and share related resources to Padlet before the teaching session. During the teaching sessions Susann also uses the student response system, Poll Everywhere, to gauge students’ opinions and understanding as the session goes along.
Dr Evan Hazenberg (English) is using Padlet as well. He puts students into small groups with the intention that each week, everyone in the group reads a different chapter, writes a one-page summary and posts the summary on a Padlet wall that is accessible to other members of their group.
We think these innovations make great use of technology by facilitating peer collaboration and deeper learning. We encourage all tutors to consider whether technology could make your teaching practices easier or more effective.
Innovations in assessment
Some University of Sussex tutors have found innovative ways of improving the quality of assessments, using assessment methods that both support the students’ learning and evaluate their skills more appropriately for the subject than traditional assessments.
For example, there are a number of lecturers who are assessing students through portfolios of work. Some expect a number of submission artefacts to be included in their portfolio, while others require students evidence weekly reflection. Prof. Robin Banerjee (Psychology) uses a portfolio assessment which expects both. He feels portfolios evidence student learning and understanding better than traditional assessments and provoke deeper learning. His assessments require students to create an online journal using Mahara, the e-portfolio system used at Sussex, into which the students incorporate multimedia artefacts such as their reflections, related images, videos and audio recordings and links to relevant materials that they have found.
Other lecturers are using video assessments to evaluate their students’ understanding of their subject. Prof. Carol Alexander (Accounting and Finance) has introduced an innovative form of assessment to enable her students to showcase and develop a range of skills including independent research. The assessment requires students to produce and present their own research in the form of a short video. Students are introduced to three video production apps (Videoscribe, Adobe Spark and Screencastify) during teaching. She finds that the assessment method intrinsically inspired many of the students to engage deeper in the topic than they would have through traditional assessment methods.
There are many ways in which students can be assessed other than the traditional methods of essay or examination. Many of these alternatives provoke deeper learning than traditional assessments and require students to evidence their skills in more authentic ways. We encourage all of you who are reading this to consider if the modules you teach are assessed in the most appropriate way or if other methods may be more effective.
Summary
You can find out more about these innovations from the case studies pages of the Technology Enhanced Learning web site. We know many other lecturers through the University are employing similar innovations to improve their teaching and the assessment of their students. If you’re one of them and want to share your practices, please contact the TEL team who will be happy to make a case study of your work. Or if you would like to help to improve your teaching or assessments using technology but don’t know where to begin, contact the TEL team who will help you get started.
Contact the Technology Enhanced Learning team at tel@sussex.ac.uk
Canvas Commons is a repository or resources and activities that you can draw upon to use in your Canvas module sites. Commons contains learning objects that other Canvas users, both at the University of Sussex and other institutions, have created and shared for wider use. You can use keywords and to apply various filters when searching to help you find resources relevant to you. You can choose to filter resources by content type (Assignments, Discussions, Images, Pages, Quizzes, etc.), level of study and who the content is ‘Shared with’ enabling you to view resources created only at the University of Sussex should you want to.
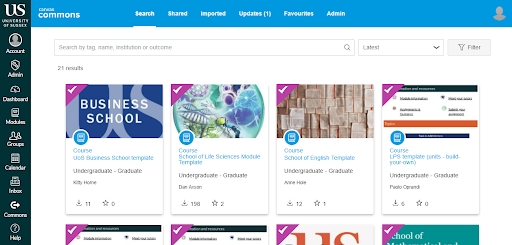
Screenshot of Canvas Commons including a search bar for keywords, a filter button and links to University of Sussex School Canvas templates.
Commons Favourites
Within Commons you can choose to ‘favourite’ individual learning objects to provide quick access to these resources later on. To add something to your favourites first go to Commons by clicking the Commons button in the Global Navigation Menu on the left of your screen (you may have to allow Commons access to your Canvas account the first time you use it). Next locate and access your chosen resource, then click the ‘Add to favourites’ button on the right hand side of the screen. You can then access all of your ‘favourited’ items at a later date by returning to Commons and clicking Favourites at the top of the page.
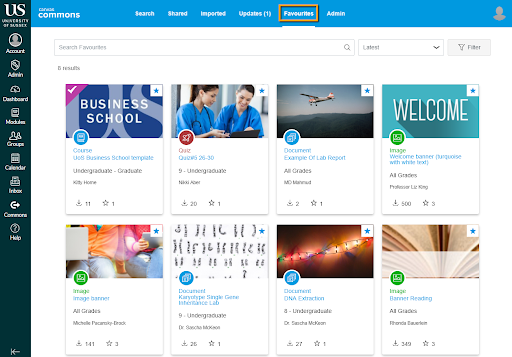
Screenshot of an example user’s Canvas Commons Favorites page showing a search bar for keywords, a filter button and links to example favourited resources such as images, quizzes and documents.
The new Commons Favourites button in the Rich Content Editor allows you to quickly access and import your favourite resources and activities straight from Commons without having to navigate away from the module you are editing.
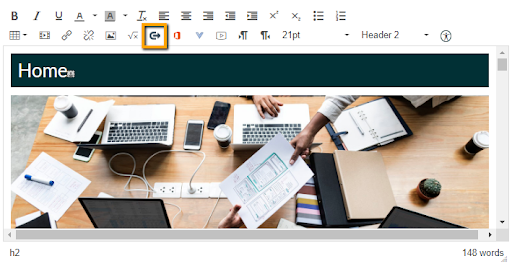
Screenshot of the Canvas Rich Content Editor with the Commons Favorites button highlighted.
The Rich Content Editor is used almost anywhere that you can edit text in Canvas. So whether you are editing a Canvas Page or creating for example a new Discussion or Quiz, you can always access your Commons Favourites. The Commons Favourites button supports the importing of documents, videos, audio recordings, and images. Click the button and then either browse all of your saved elements or use the search function to search for keywords or filter by resource type. Then simply click on the element that you want to use and it will be imported into the content that you are currently editing. Depending on the size of the learning object, this can take a couple of minutes. For a step-by-step guide see How do I import Commons Favourites in the Rich Content Editor in Canvas?
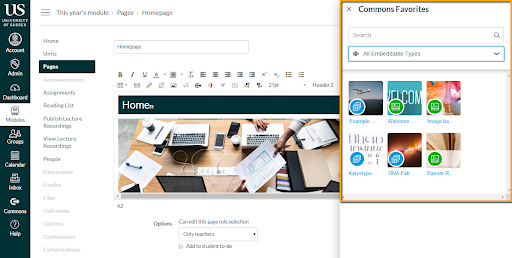
Screenshot of a Canvas Page being edited with the Commons Favorite pop-out window highlighted.
Don’t forget that you can also share your own resources and activities to Canvas Commons if you have created any learning objects that you would like to share with your colleagues or the wider Canvas Community. If you would like more information about Canvas Commons see the Canvas Community Instructor Guides which contain FAQs and step-by-step guides. The University of Sussex is using Canvas Commons to share School modules templates, if you would like help importing and using your School’s template please contact tel@sussex.ac.uk or visit our Eventbrite to see if there is a support session for your School.
If you’ve attended any TEL training recently, you’ll have heard us mention digital accessibility. This means making sure online teaching materials are usable for students with disabilities or specific learning needs. This year sees the introduction of new legislation governing accessibility of websites and mobile applications for publicly funded institutions, including universities, so it’s important to make sure that the digital content of our modules meet the necessary requirements.
As mentioned in our previous blog post we’ve developed some guidance to help you make your module sites accessible. I’d encourage you to look at these. In this post I’ll present a suggested workflow for making sure your module is accessible.
I’ll look at a typical module, based around a number of Canvas pages, including a homepage and several topic pages, one for each week. These pages include text, pictures and one or two videos. The module also includes links to PowerPoint slides, handouts in Word and PDF format and a reading list.
Step 1. Check the checklist
Before you start, it is a good idea to get a basic idea of what to look out for. We’ve summarised this in four key design principles:
Structure your content
Provide text alternatives for video, audio and images
Use of colour
Use descriptive text in links and headings
These principles apply across all of the formats mentioned above (Canvas, Word, PDF…). You can read more about these on our accessibility Create page. To make things easier, we’ve created a list of Do’s and Don’ts to check.
If this all sounds alien to you, the good news is that we’ve made sure these principles are baked-in to your School module templates. So as long as you use your school template you shouldn’t have to worry about the main module home page, assignment information and weekly/topic pages (if the template includes them).
Step 2. Review additional Canvas pages, Word documents and PDFs
For content beyond the core template pages the key thing to be concerned about is the structure. Alternative (alt) text for images (and for Canvas pages, colour contrast) should be picked-up using an accessibility checker which we’ll come to in a bit.
Structure your content with headings in Word
Word, PowerPoint and PDF checkers won’t test for appropriate colour contrast but if you keep to the combinations used in the templates you should be fine.
If you have the choice, PDFs should be avoided. They don’t adapt well to different screen sizes and if you don’t keep the source document they can be hard to edit and to make accessible.
Step 3. Provide text alternatives for video
If you’re using video I have some good news. Box of Broadcasts, Kanopy, YouTube, and our upcoming lecture capture system, Panopto, provide either subtitles or closed captions for most video they host. With the latter two, these are auto-generated and can require a little tweaking to get them correct. You will not be expected to manually correct subtitles unless explicitly requested by students on a per video basis.
Step 4. Use an online reading list
Next we come to reading lists and there is more good news. Provided you follow the processes recommended by the Library, you shouldn’t need to do anything extra.
All reading for your module should be passed via the Library reading list. The Library will then ensure the readings are accessible.
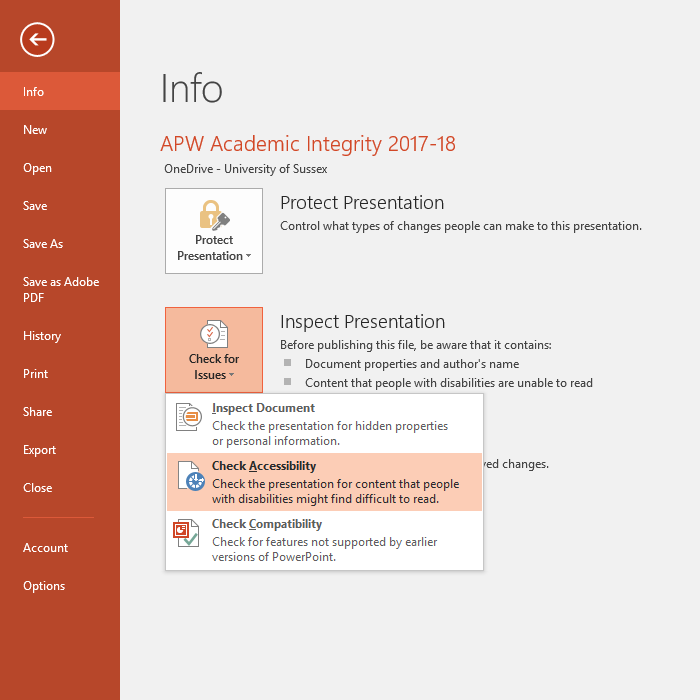
Step 5. Run an accessibility check
There are built-in accessibility checkers in Canvas, Word, PowerPoint and Adobe Acrobat (for PDFs). The better the accessibility of the original document, the better these will work, so like a spell check, this is best done last.
A couple of points to bear in mind:
Not all images require alternative (alt) text. If an image is purely decorative the alt text can be left blank. Canvas allows you to tick a box to declare the image is decorative.
There is a degree of personal judgement required. Accessibility checkers won’t tell you something is definitely inaccessible. They will just suggest things that look problematic.
PowerPoint, Word and Excel have inbuilt accessibility checkers
Accessible design benefits everyone
Hopefully I’ve persuaded you that this is not as onerous as it may originally have sounded. If you still find yourself asking why you need to do this now when you don’t know of any students with disabilities or specific learning needs on your module, I have a few last points to mention:
Not all students who have accessibility needs will present themselves to you and while you may not have someone this year you may well the next.
You gain too. Accessible design is just good design which benefits everyone. Have you ever been sitting in a noisy room or on a quiet train without headphones and wanted to watch a short video but it didn’t have subtitles? Have you spent time searching through a Word document trying to make all the headings look the same, or spent precious minutes picking-out headings to put together a table of contents? Have you spent ages zooming in and out of a PDF document on your phone trying to read the tiny text? Have you spent three clicks too many looking for the “click here” which takes you to the page you want to see? Have you used an app to read-out a web page to you to give tired eyes a break? I could go on.
If you have any further questions or concerns please contact tel@sussex.ac.uk and we’ll do our best to help.
Summer is here, but before we know it students will be arriving to begin the 2019-20 academic year. Before then, teaching staff will want to prepare their Canvas modules and related materials. To support staff during this process Technology Enhanced Learning have created two new sets of resources and are arranging face-to-face sessions. This post will give an idea of what is available.
Rollover – copying module content from year to year.
New, empty Canvas sites for 19-20 were created and made available to staff on 10th June. People teaching new modules can now start building their sites, but for most modules, convenors will want to copy at least some content from the 18-19 version. Most Schools now also have a module template which staff may be using for the first time. These have been introduced in response to student requests for greater consistency between modules.
On the TEL website we now have a Canvas Rollover page which provides step-by-step guidance on the process.
The Learning Technologists in the TEL team are also contacting the Schools they work with to offer sessions where colleagues can get together to work on their sites with help on hand. If you would like to be included in any workshops for your School please contact tel@sussex.ac.uk
Accessibility – an improved learning environment for all
Accessibility has always been an important consideration when reviewing, updating and creating online materials, but with the new accessibility requirements for public sector bodies coming into effect this is now a legal requirement.
Digital Accessibility web pages have been added to the TEL website, offering guidance on how best to provide an improved learning environment for all.
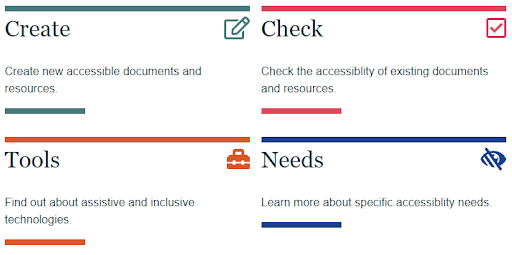
The guidance is presented in 4 sections:
Create – looks at structuring content, providing alternatives, using colour and descriptive text. There is also a downloadable checklist poster.
Check – shows how to check the accessibility of Pages in Canvas; Microsoft Word documents and PowerPoints; PDFs; Google documents and slides; Apple Keynote and Pages files.
Tools – looks at some tools which can be used to support students with specific learning differences.
Needs – provides some examples of the types of challenges that students may face depending on their individual needs, with links to find out how to improve resources accordingly.
As we move into the second year of Canvas at Sussex, colleagues are starting to think about how they might use some of the additional functionality of the platform. When planning modules for the coming year don’t forget that Canvas offers:
The above blog posts introduce each of these options but as always, the TEL team are very happy to discuss how they (or other tools) might be used.
Where can I get more help?
The TEL team is here to support teaching staff as they prepare module sites and materials, so if you have a question or want to discuss options please contact tel@sussex.ac.uk
Dan Axson and Kitty Horne caught up with Dr Maren Deepwell, CEO of ALT, Mary Agnes Krell, Senior Lecturer in Media and Film Studies and Dr Tamsin Hinton-Smith, Senior Lecturer in Higher Education. We talk about all things technology, learning technology, favorite shortcuts and apps we couldn’t live without. We also discuss their formative technology experiences, how technology and equality are an embedded aspect of the PGCertHE and how the learning technology landscape has changed over the last 12 years.
A note on audio (again…). I couldn’t mic everyone, so I thought I had enough coverage with the two table top mics and a Blue Snowball, however I forgot to press record on the iPad (for the Snowball) so apologies to Kitty, who has a very quiet audio as a result.
How it was made.
Two standard table top mics into Zoom H4n
Blue Snowball into iPad
Forgot to press go on iPad for the Snowball (Sorry Kitty)
Salvage audio in Adobe Audition
Record Intro and Outro with Table top mics into Zoom H4n
When you hit your bed at night do you sometimes feel that you haven’t achieved what you hoped to? If so, you may be helped by using online organisational tools. When many of us start a project, big or small, we often start by writing lists, but writing and lists are linear and our thoughts aren’t. Consequently using alternatives to text and lists can increase our productivity. The common feature of my favourite organisational tools is that they are non-linear and visual and this helps us formulate our thinking and plan our time. That is why in the TEL team we use organizational tools to help us run our day and to be more productive.
Let me start with an example. Writing this blog post was not the only thing I needed to do today. There were a number of other competing tasks. However with the help of a project management board I am able to timetable and prioritise this task. Today, writing this blog post was at the top of the agenda.
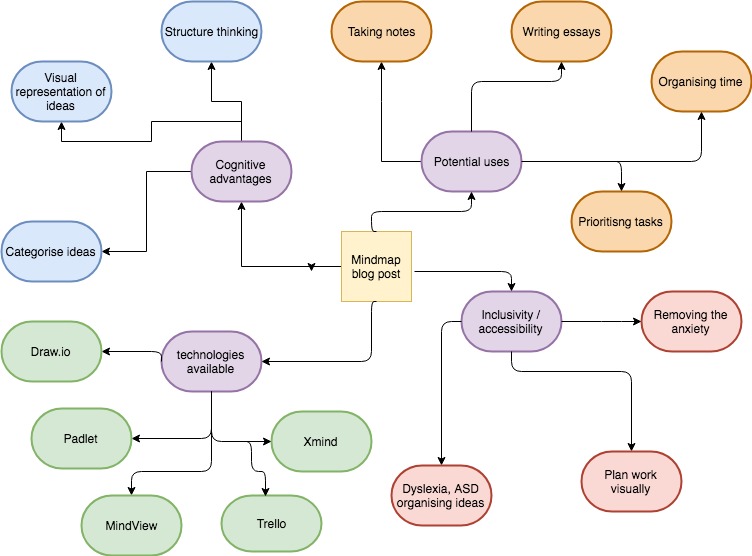
Having prioritised this blog post as my top task for the day, the first thing I did was to draw a mind map of the things I wanted to say in the post. I had a host of ideas but how could they be organised? I used a second organisational tool that helps me organise my day-to-day work life – a mind map. Mind maps can be a paper exercise but there are several n big advantages to using computer-based tools.
It is important at this point for me to note that the tools this post introduces will be of interest to you but the same organisational tools will be of use to students. It is a good idea to introduce tools like this to your students because they can help them organise lecture notes, organise their thinking and they are a great way of getting started on an essay. Furthermore there are some important accessibility barriers that these tools help students overcome, making your teaching more inclusive to all students whatever their background or circumstances.
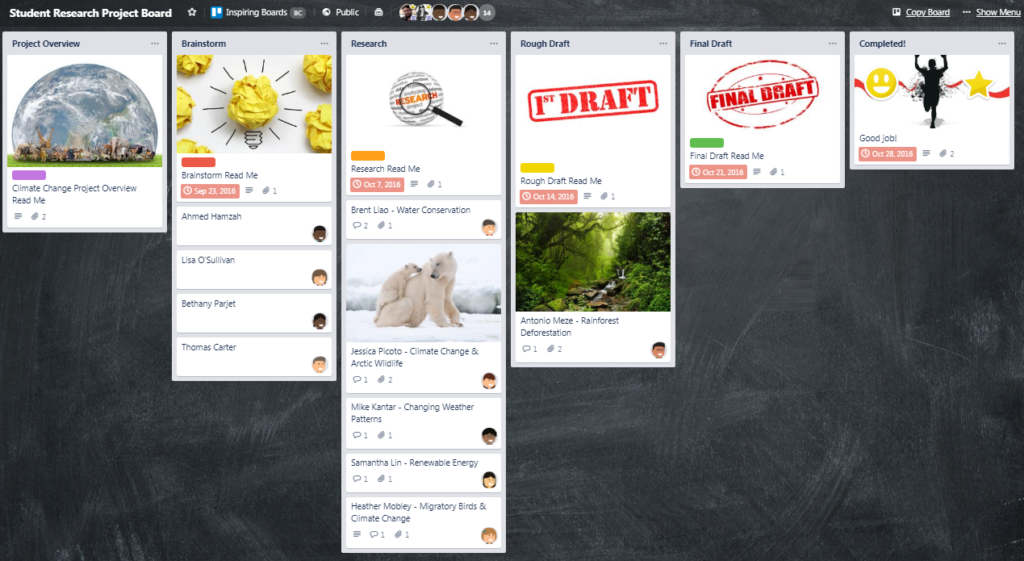
Introducing Trello
Trello is project management software that we have mentioned before. I have a number of boards on Trello including the high stakes projects I am working on and the day-to-day management of tasks including email responses and so on. Depending on the type of project on which I am working the board may be collaborative with other team members or private to me.
In my opinion thes greatest strengths of Trello are its usability and its flexibility. Trello is highly featured but it is also simple to use. It allows you to easily and quickly visualise the tasks you and others in your team are engaged with and their current status.
You have a row of column titles that can be whatever what. In my day-to-day planner, they include stalled tasks, pending tasks, active tasks, awaiting review and ongoing tasks. The cards can have:
labels indicating the type of task they represent
a checklist of things that need to be met before completing the task
a due date
attached files
You can create a Trello card from an email just by forwarding the email to the special email address provided for each board.
Cards can easily be moved from column to column – for example in my day-to-day planner I can move a task from pending to active by simply dragging the card to the new column.
Mind mapping is a useful activity to me because I can throw down ideas as they come, in whatever order. An important element of the mind map is that I can easily move these ideas about because once I have included everything I can think of I start to categorize and structure them into an intelligible plan or argument.That is where using post-it notes or software is better than using pen and paper where the representation of ideas can become fixed.
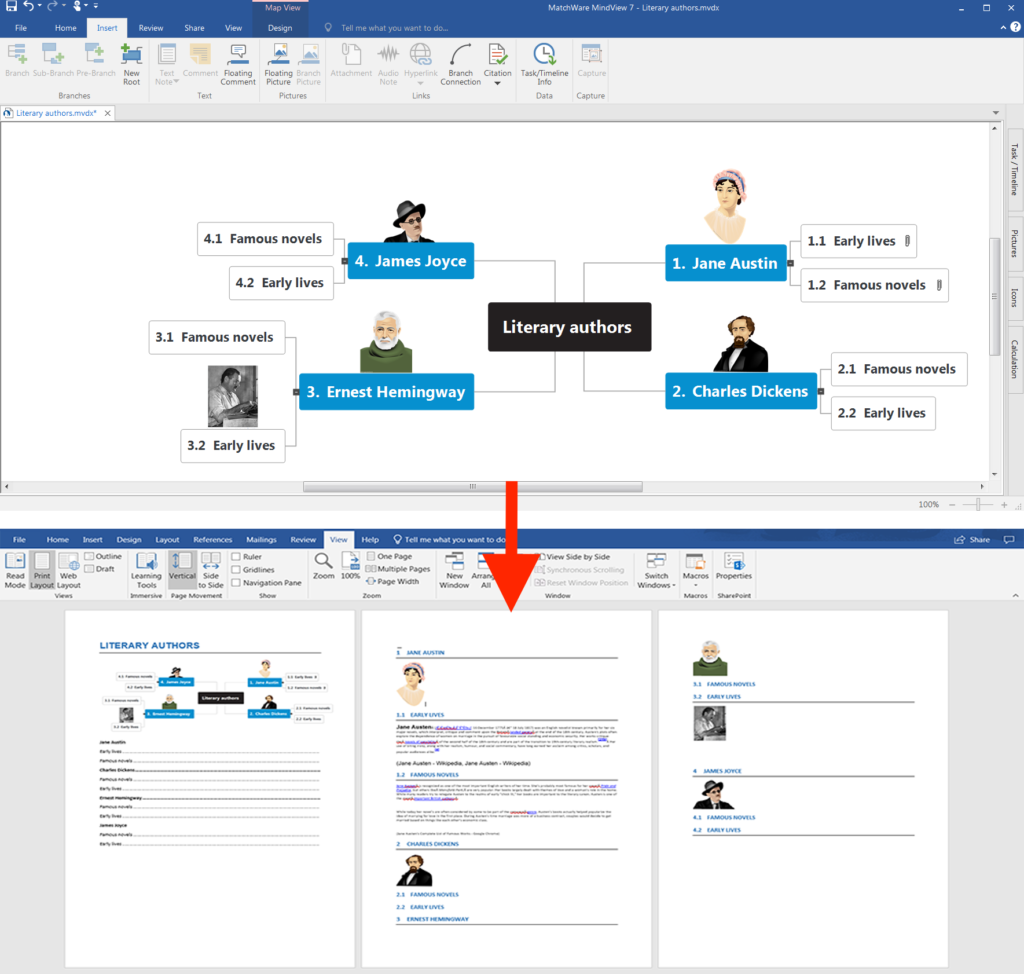
MindView is great because it is easy to drag and drop items and make a hierarchy of connected ideas. It is easy to make MindView visual as you you can easily add pictures from its own stock of images, from the web or from your own collections. It is easy to grab text from different sources and pull them into your mindmap. Furthermore, it’s easy to order your ideas and give an estimation of how long they will take.
All these features make it an extremely useful tool, but its real strength over other mind mapping software is its ability to convert the thinking that has gone into creating the mindmap and ordering the ideas into the next stage of the project. For example you can switch your view of your ideas into a Gantt chart. Perhaps the most useful thing you can do though is convert your mind map into a Word document or Powerpoint so your ideas can easily become the start of an essay or report., and you don’t need to throw away or rewrite your thinking.
Mindview mind map can be viewed as a Gantt chart or exported into a Word document.
Summary
The beauty of organisational tools is that they help us plan our time, keep track of our ideas and structure our thinking into clear plans and documents. These management tools help all of us and are particularly helpful to those among us who struggle to assimilate concepts and make clear arguments.here are a number of tools available that can make us more productive in our working days. I use the two the above but there are many alternative organisational tools. The university has a site license for MindView and it is compatible with Windows or Mac, but not mobile devices. Other mind mapping tools, such as Mindmeister and bubbl.us can be used on mobile devices but do not have the advantage of converting to Word or PowerPoint.
You can find more useful digital tools in our A-Z of apps.
Daniel Hajas is a PHD Student at the University of Sussex, working multisensory experiences, with special emphasis on the topic of using mid-air haptic interfaces for science communication in the Sussex Human Computer Interaction lab.
As part of our Digital Accessibility series I caught up with Daniel about his experience of losing his sight at age 17. A crucial time in education and just as he was planning his university journey. Daniel talks about his experience of this, the challenges and how he was supported, along with some tools he uses. Daniel finishes by giving some great advice. Check it out on Spotify below. Or subscribe and listen on Apple Podcasts or Anchor.FM
Each time i record a podcast, I do something different. Still trying to find the right tools or the easiest tools for the job. It’s also quite fun playing around with different combinations of tech. So from here on in, until I settle on a preferred set up I will list (in brief) the tools and workflow I used.
For this show:
Twin lapel mic and iPad for interview
Record into Otter.ai app for iOS
Export audio to GarageBand to try and fix audio
Record host intro and outro with Blue Snowball and MacBook Pro into GarageBand
We are the Educational Enhancement team at the University of Sussex. We publish posts each fortnight about the use of technology to support teaching and learning. Read more about us.