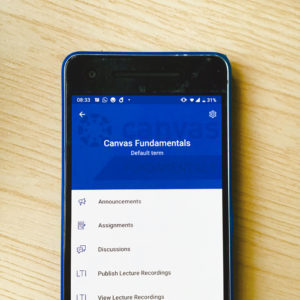
5 ways to make online discussions work in your teaching

Have you ever tried to complement your teaching with an online discussion and found that the student engagement is sporadic or non-existent? If you have you may stand with many tutors who have given up on online discussions, but did you know:

  • Ensuring our students engage in discussions is a matter of inclusivity and equality. The main stream cohort of your students will engage in disciplinary discussions with each other outside of teaching time because they are in the same or similar social groups, but those on the periphery often do not get the opportunity to discuss disciplinary topics in the same way.
  • Discussions are a process where students receive immediate feedback – feedback from their tutor, feedback from their peers and self-reflective feedback as they prepare to contribute to the discourse and respond to the questions raised.
  • The depth and richness of your students’ learning is increased by topic-related discussions.

Online discussions do not replace face-to-face discussions, but they can supplement them and they have a number of advantages, including the ability for students to participate in them in their own time and wherever they are.

So how do we get online discussions to work?

1. Start using the discussion forum at the start of the module

Setting the expectation that your students will be engaging in online academic discussion early in the term helps them to continue the practice for the duration of the module. In this period it is useful to set out to your students how engagement in online discussions will help them learn the academic theories at a deeper level than they would otherwise.

It is harder to get students to participate in online academic discussions if you begin to use them midterm, because the students will think of them as optional and an unnecessary addition to their studies.

2. Reference the discussion regularly in face-to-face teaching

When you mention the discussions in your teaching the students begin to understand participation in the forum as being integral to their development in the module. In order to kick off a discussion it is useful to tell students, during teaching time, that you have set a question on the online forum and you expect them to respond. Once an online discussion has taken place, reference it in your teaching, and summarise the responses and the learning that the discussion has evidenced.

There are advantages when you post an academic question on the forum just before your teaching session. Many of the students will go to straight to their VLE site after the face-to-face session and will want to respond to the questions you’ve set immediately.

3. Pose open questions that do not have right or wrong answers

It’s important to ask the right questions to provoke reflective and critical discussion. Discussion is more likely to ensue if your questions are open and ask for the students’ experiences and their opinions. Questions that have right or wrong answers do not tend to provoke much discussion and can leave students who leave the wrong answer feeling exposed and demotivated.

4. Ask questions that are relevant to the student assessments

The focus of the students’ attention tends to be on what will be assessed. It is therefore important that the students understand that their participation in the discussion will align with learning that ultimately meets the assessment criteria.

The number and quality of the responses improve when the questions you ask clearly align to the assessment criteria, and you can be quite explicit how they do so when you introduce the discussion topic.

If the module is assessed by essay, the number and quality of the responses improve when the questions are generic enough that they will be useful to all students whatever their essay title, for example, focusing the questions on theories that can be applied to any essay in the topic area.

5. Pose a new question every week

There are advantages in designing your curriculum with regular learning activities. Activities that are one-off or irregular feel piecemeal and students feel free to not engage.

The regularity of activities means that more students are likely to do them, so you may see more participation in online discussions if you set them every week and keep referring to them in your face-to-face teaching throughout the term.

In summary, disciplinary discussion is an important part of your students’ learning. Some of your students will get the opportunity to discuss the topics by dint of the fact they have friends in the cohort, but some will not unless you set up opportunities for them to do so. Online discussion is one way to give them this opportunity, but it is often hard to get your students to engage so I hope this post has provided some strategies to help facilitate online discussion to support your teaching.

If you’re interested in using online discussion in your teaching feel free to contact the Technology Enhanced Learning team on tel@sussex.ac.uk. Please also have a look at our recent blog post highlighting the Discussions feature in Canvas – the new Sussex VLE.

Canvas Training

Places are filling up fast on our Canvas Fundamentals training workshops. We strongly encourage all Sussex academic staff to sign up for a place. Attending the workshop will familiarise you with Canvas and your options for teaching with the new VLE. It also gives you access to your migrated modules from 17/18.

Professional Services staff are also welcome to book a place on this workshop.

Tagged with: , , , , ,
Posted in Active learning, Blended learning

Canvas Know-how 4: Creating a Glossary in Canvas

Canvas Know-how 4. Creating a Glossary in Canvas

Whilst Canvas provides a variety of new opportunities that weren’t available in Study Direct, there are a couple of resource types that don’t have a direct Canvas equivalent. One of these is the Glossary tool, which has been used in some modules to provide a reference bank of terminology for students.

To offer a similar reference bank for students in Canvas you can create a Page from your existing Study Direct Glossary content. Below are the steps to copy the existing entries across.

Creating a Page in Canvas from a Study Direct Glossary.

  1. Go to Study Direct, find the Glossary and click on the name to open the glossary.
  2. Make sure the view is set to All.
  3. Now click on the small Print icon to create a print-friendly version.
  4. In the print view, right-click and choose Save As. This will save your glossary as a HTML webpage, usually called ‘print’ (although this might vary, depending on the web browser you are using).
  5. Open the website file you have just saved, and right-click to select ‘View page source’. You will see something like this.
  6. You don’t need to understand this HTML code – just highlight it all and copy (CTRL-C).
  7. Then go to Canvas and create a new Page.
  8. Open the Page and select Edit.
  9. Now click on HTML Editor.
  10. Paste the HTML code you copied at step 6 into the editor.
  11. Click on Rich Content Editor to see how your page will look. There will be a few lines at the top of the page you will want to edit out so that you are left with something like this.
  12. Don’t forget to Save or Save & publish.

You will now have a Canvas Page with all your Glossary entries in alphabetical order. If there are a lot of entries in your glossary your students can use the standard browser CTRL-F command to search for specific entries.

Allowing students to add to or comment on the Glossary

One of the best features of the Study Direct glossary was the ability to have students contribute words / concepts and definitions. This can also be done in Canvas, because you can allow students to edit a Page. When you are editing a page you will see Options where you can choose which type of users can edit it. Click the dropdown and select ‘Teachers and students’ to allow students to edit the page.

What if someone makes a mistake?

You can view the History of the edits to a page by clicking on the 3 dots next to the Edit button. A full Revision History will appear showing who made edits and when. You can then choose to Restore an earlier version.

Canvas support from Technology Enhanced Learning

If you would like further advice on creating a glossary or to discuss options for other student activities in Canvas please contact tel@sussex.ac.uk

Canvas Training

Places are filling up fast on our Canvas Fundamentals training workshops. We strongly encourage all Sussex academic staff to sign up for a place. Attending the workshop will familiarise you with Canvas and your options for teaching with the new VLE. It also gives you access to your migrated modules from 17/18.

Professional Services staff are also welcome to book a place on this workshop, although we are in contact with several School Administrators to arrange specific sessions for School Office staff.

Tagged with: , , , ,
Posted in Canvas

Canvas highlights 8: Embedded Reading Lists

Canvas highlights 8: Embedded Reading Lists

[note: this post has been updated to reflect a terminology change on the Sussex Canvas VLE, to align it to Sussex terminology]

As part of the ongoing work to integrate core University resources with Canvas, we’re really delighted that the Talis Aspire reading lists are now fully operational within the VLE. To mark this, our latest Canvas Highlights post, written for us by our colleague Rachel Bramley, Learning & Teaching Librarian here at Sussex, explains how to make use of the integration and embed reading lists within a Canvas module.


Quote markIsn’t it great when students can easily find what they need?

Students should be able to find their reading lists through the related Canvas sites. There is an option on your Canvas menu that automatically displays the whole online reading list.  If you choose to, you can also embed each weeks’ readings into the relevant sections or ‘Units’ within your Canvas sites too.

The reading list in Canvas will be ‘live’, so if you make any changes in the Talis Aspire Reading List site, they will instantly be visible on Canvas.  And because of the improved integration, students won’t be taken out of Canvas when they navigate to the reading list, it will open up within the same page.

Display Your Online Reading List in Canvas

The option that automatically links to the relevant online reading list, appears in the Module menu under Reading List.  It uses the unique module code to identify match the module to the correct list, although as a tutor you should visit the link to confirm this match before it gets set up for your students.

Screenshot showing the Reading List view, with menu link, list name, search box and save button highlighted
The initial view of the reading list, showing (1) the Reading List menu item, (2) the name/code of the selected list, (3) the search box where you can look for a different list, (4) the Save button to confirm this list as the one to be used.

Having clicked Reading List (1), you can check the module code/title is correct(2) (you may first need to confirm your login).  If it’s not right, or you need to link to a different list, you can type in the required module code/title to search for and select it (3).

You will also see, next to the list title, a box saying “The list”. This option will display the entire reading list, although you can choose to show less if you prefer (see below).

Once you are happy the list is the correct one, click save to confirm it (4). This list will now always be displayed to you and your students when you click the Reading List menu link. If you’ve accidentally linked to the wrong list, as a tutor you can use the “relink” option to start this process over again.

Screenshot showing a student's view of the reading list in Canvas
A student’s view of the confirmed reading list in Canvas
Screenshot showing the relink option
The relink option in a tutor’s view of the confirmed reading list

Embed Sections of your Online Reading List in Canvas

You can also link to relevant sections of your online reading list, for example if both the reading list and your Canvas site use a week by week structure. Here’s how:

  1. In the “Units” view of your Canvas site (which may also be the home page), go to the relevant unit, for example Week 1.
  2. Select ‘+’ to add a new item in the unit
    Screenshot showing the Modules view in Canvas
  3. Select ‘External Tool’ from the dropdown menu.
    Screenshot showing the External Tool option
  4. Select ‘Reading List’ from the options and ‘Add Item’.
    Screenshot showing the Reading List external tool option
  5. You now need to choose what section of the list should be displayed here: click on the link saying ‘Reading List’, in the item you just created.
    Screenshot highlighting a Reading List module item
  6. This will open up the reading list in full and give you options at the top. Click on the drop-down menu (1) and select the relevant section you wish to display.  Then click ‘Save’ at the top, on the blue button (2)
    Screenshot showing the reading list section selector
  7. When back on the Units page, give the item a clear title, for example ‘Week 1 Readings’. To do this, click on the three-dots icon on the right hand end of the item row and select ‘Edit’.  Type in your preferred title and click on ‘Update’ to save.
    Screenshot showing name editing for a reading list item
  8. Lastly, don’t forget to publish it!
    Screenshot showing the publish icon

Support from the Library:

If you would like help getting started with online reading lists or if you want further help, please contact readinglists.lib@sussex.ac.uk or phone us on x7926.

Online support:

Our online help pages contain detailed instructions. These and more information about reading lists, digitisations and purchasing policies can be found on the Library website, under ‘Support for Teaching’:

http://www.sussex.ac.uk/library/teaching/readinglistsupport

Rachel Bramley, Learning & Teaching Librarian


Our thanks to Rachel for this Highlights post. Whilst Talis Aspire is a core University resource and should be used for reading lists across all taught modules, we know that some Canvas sites will not have a Reading List associated with them. In these cases, you might wish to remove the Reading List menu item from view to avoid confusion. Please refer to our Canvas Know-how post on the Module Menu for advice on how to do this.


Canvas Training

Places are filling up fast on our Canvas Fundamentals training workshops. We strongly encourage all Sussex academic staff to sign up for a place. Attending the workshop will familiarise you with Canvas and your options for teaching with the new VLE. It also gives you access to your migrated modules from 17/18.

Professional Services staff are also welcome to book a place on this workshop, although we are in contact with several School Administrators to arrange specific sessions for School Office staff.


Tagged with: , , , , , , ,
Posted in Canvas, Images and Copyright

Canvas Know-how 3: Managing the Module Menu

Canvas Know-how 3. Managing the Module Menu

[note: this post has been updated to reflect a terminology change on the Sussex Canvas VLE, to align it to Sussex terminology]

One of the most significant differences between the structures of Study Direct and Canvas is an increased range of navigation options for students. In the side menu of Study Direct the module was represented as a single linear ‘journey’ from top to bottom through the resources and activities. With the Canvas “module menu”, this ‘journey’ representation of the module is only one of the available ways of viewing the content, provided by the “Units” view. Students now have a number of additional ways they can filter or present a selection of the study materials and activities.

Some of the menu items will select and display just a single activity type, such as assignments, discussions, quizzes or conferences (for more about conferences, see our Canvas Highlights post). This allows students flexibility in how they access a particular activity, rather than having to find the relevant week or topic first. You can expect to see additional items in the module menu for the Talis Aspire reading lists and for lecture capture recordings as we move through the Summer, which will provide similar direct access to these resources.

There are other menu items that focus on particular sets of information within the module, such as the people, students and staff, participating in it. This “People” menu item also gives access for students to work in groups; these might have been set up by their tutors but students have the option to create groups of their own from amongst the module participants. The “Grades” item gives access to records of all the grades and feedback assigned to online assignments, contributory and non-contributory, within the module. The “Home” link will always return them to the starting page for the module site, which can be set to a number of different options by the module teaching team. We’ll explore these home page options in a forthcoming Canvas Know-how post.

A guide to the Canvas Module Menu items

Canvas - A Guide to the Module MenuTEL has produced a detailed, printable desk guide, which explores the structure of the module menu and the function of the individual menu items.

Alternatively, you can read Canvas’ own guide to the Course Menu online (note that, by default, Canvas uses a different terminology, referring to modules as “courses”).

Managing the Module Menu

One of the features of the module menu is that it can be configured by module tutors. Within each Canvas module settings area is a “Navigation” section, which allows you to change the order in which module menu items are displayed, for example to bring the most important ones for that module to the top of the list; it also allows you to hide unwanted menu items from students.

Because consistency of navigation is so important to students’ experience of the VLE – students repeatedly cite inconsistency of experience as an issue in their use of online environments for learning – we strongly recommend that Sussex colleagues agree a standard sequence to the module menu items within their Schools. TEL will be very happy to facilitate and advise on this.

Canvas Training

Places are filling up fast on our Canvas Fundamentals training workshops. We strongly encourage all Sussex academic staff to sign up for a place. Attending the workshop will familiarise you with Canvas and your options for teaching with the new VLE. It also gives you space to work on your migrated module content from 17/18.

Professional Services staff are also welcome to book a place on this workshop, although we are in contact with several School Administrators to arrange specific sessions for School Office staff.

Tagged with: , , ,
Posted in Canvas

Blending Classroom Teaching with Online Learning in your VLE – Podcast S02 E04

Sussex TEL: Teaching with Tech S02 E04 – Blending Classroom Teaching with Online Learning in your VLE with Claire Fennell

In this episode, we talk to Claire Fennell, a Senior Instructional Designer at University College Cork in Ireland, about how to blend classroom teaching with online learning in your virtual learning environment (VLE). As we approach a new academic year, it’s a great opportunity to think about how you can build, update or redesign a site in your VLE to integrate aspects of online learning into your classroom teaching. Claire introduces the ADDIE model of instructional design and a range of interactive tools, such as Sway, Roojoom, Google Forms and Screencast-o-matic, which can help to enhance teaching and learning in both online and offline spaces. Check out this episode for tons of useful tips, tools and strategies for creating effective blended learning activities for your learners.

Links:

Claire Fennell
– Twitter: @clairefennel (https://twitter.com/clairefennell)
– Profile at University College Cork (https://www.ucc.ie/en/teachlearn/people/clairefennell/)

University College Cork Instructional Design
– University College Cork Instructional Design website (http://instructionaldesign.ucc.ie/)
– Twitter: @id_ucc (https://twitter.com/id_ucc)

Tools
– Microsoft Sway (https://sway.com/)
– Roojoom (https://www.roojoom.com/)
– GSuite for Education (https://edu.google.com/)
– Google Forms (https://www.google.co.uk/forms/about/)
– Google Docs (https://www.google.com/docs/about/)
– Microsoft Forms (https://forms.office.com/)
– Office 365 (https://www.office.com/)
– Screencastify (https://www.screencastify.com/)
– Screencast-o-matic (https://screencast-o-matic.com/)
– Zoom (https://zoom.us/)


Canvas Training

Places are filling up fast on our Canvas Fundamentals training workshops. We strongly encourage all Sussex academic staff to sign up for a place. Attending the workshop will familiarise you with Canvas and your options for teaching with the new VLE. It also gives you space to work on your migrated module content from 17/18.

Professional Services staff are also welcome to book a place on this workshop, although we are in contact with several School Administrators to arrange specific sessions for School Office staff.

Tagged with: , , , , , , , ,
Posted in Blended learning, Learning Design, Podcast

Canvas highlights 7: Discussions

Canvas Highlights 7 - Discussions

Discussion boards are a common feature of VLEs, supporting the collaborative exploration of ideas and understanding that plays a central role on the development of knowledge. Canvas Discussions offer a rich set of options and a clean, highly usable interface.

Screenshot showing a tutor's view of a Canvas Discussion topic
A tutor’s view of a Canvas Discussion topic, showing information icons

Tutors and students will be able to see how many posts have been added and how many they have yet to read. Everyone can also subscribe to the Discussion, by clicking the green ribbon icon. Subscribing means you will be notified of any new contributions. Notifications reduce the chance of missing contributions that you would find relevant or would like the opportunity to respond to in a timely manner.

Writing a contribution to a discussion uses Canvas’ rich content editor, which means that you and your students can add all kinds of media content to your posts. As a tutor you can attach files from your computer and you can extend this capability to students, through the discussion settings. You can also place links to other module locations or content (such as assignments or seminar notes) directly within the discussion post.

Linking to other module resources within a forum post.

As a tutor you can pin a Discussion to the top of the Discussion area, to give it prominence and mark it as especially important. You can either drag and drop it into the “Pinned discussions” area, or select “Pin” from the Discussion’s options menu.

Screenshot highlighting the pinned discussions area
View of the Discussions area, highlighting the Pinned discussions.

Students can be given a range of capabilities (or these can be removed) through the discussion settings. These are opened by clicking the cog icon on the Discussions area of a Canvas course. By default they are allowed to add new discussions and to edit or delete their own posts, but these permissions can be reversed if necessary. As indicated above, they can also be allowed to attach files to their discussion posts, which might be useful for sharing drafts of written work for peer or tutor feedback.

Screenshot of Canvas Discussions settings
The discussions settings box

Use Cases

Canvas Discussions provide excellent support for several situations:

  • For focused, short lived discussions around a single topic, the default Discussion options will allow responses from the students and then counter-responses from other students or tutors (which will display connected to the original response). If you want to close the discussion, you can lock the Discussion to prevent further replies.
  • For longer discussions where replies can become triggers for side-discussions, Canvas offers an option to  “allow threaded replies” . When threading is set all replies are indented from their “parent” post to give a more nuanced picture of the flow and tracks of the conversation.
  • Discussions can be used combination with Canvas’ group settings to create group-specific discussions; students will only be able to contribute to the discussion for their group, but tutors will be able to join in all group discussions.
  • Where you want students to give a personal response to an issue or prompt, you can prevent them from viewing anyone else’s posts before they’ve made one of their own. This is the “Users must post before seeing replies” option.
  • Discussion contributions can be assessed. When marking the discussion, you can isolate each student’s comments from the thread and combine them into one easily readable view. You can also vary the due dates for different students or groups of students as necessary.
  • Light-touch peer feedback can be provided by allowing students to “like” posts, in much the same way as on Facebook and Twitter. You could employ this as a tactic to increase the students’ motivation to contribute to the discussion and their engagement and interaction with the topic.
  • All Discussions can be given availability dates: students will be able to see that the discussion exists, but will not be able to view the content until after the “Available from” date and will not be able to make further contributions to it after the “Until” date
Screenshot showing the options for individual discussions in Canvas
The options settings for each individual Canvas discussion.

For more information on Canvas Discussions, please visit the Discussions guidance provided by Instructure themselves.

Canvas Training

Places are filling up fast on our Canvas Fundamentals training workshops. We strongly encourage all Sussex academic staff to sign up for a place. Attending the workshop will familiarise you with Canvas and your options for teaching with the new VLE. It also gives you access to your migrated modules from 17/18.

Professional Services staff are also welcome to book a place on this workshop, although we are in contact with several School Administrators to arrange specific sessions for School Office staff.

Tagged with: , , , , ,
Posted in Canvas

Canvas Know-how 2: Making Use of Announcements

Canvas Know-how: Making Use of Announcements

[note: this post has been updated to reflect a terminology change on the Sussex Canvas VLE, to align it to Sussex terminology]

Announcements in Canvas are a great way of making students aware of important news. For example, if there is a change to the venue for a seminar or you want to remind students to bring something to a session, an announcement can bring this to students’ attention inside Canvas.

megaphone icon

Where will the Announcements be seen?

Announcements can be seen in several places within Canvas. Students also have a number of options about how and when they receive notifications of new announcements (as do all Canvas users). They can choose these in the notifications section of their Account settings. Regardless of these settings, all students will see the announcement in the following three locations:

Location 1: On the Dashboard

There is a notification about announcements on the Module Tile which appears in Dashboard for staff and students. In this example there are 3 unread announcements.

Dashboard Module Tile showing unread announcements.

Location 2: At the top of the Module Home screen

In the Module Settings, tutors have the option to have recent announcements appear at the top of the Module Home screen. You can also set how many announcements are displayed. This Canvas Guide shows you how to show recent announcements in the Module Home Page.

Announcements at the top of the Modules Home screen

Location 3: In the Announcements section of the Canvas Module.

Announcements will always appear in the Announcements section. This is where you can add new announcements and delete old ones.

The Announcements section of a Canvas Module.

How do I add an announcement in a module?

To create a new announcement, go to Announcements in the Module Menu and click the red +Announcement button. You will need to give your announcement a title (think of this as the headline) and enter some text, images and/or links using the Rich Content Editor. You can also upload a file if required.

There are then some further options, such as:

  • Choose to delay posting of your announcement, selecting the date and time when you want your announcement to be posted. This could be useful if you want to remind students about something in a particular week.
  • Allow ‘liking’. Depending on the type of Announcement, this opportunity for students to signal value or importance of an announcement could be useful.

Your post will then appear in Announcements (and on the Home screen if you have set that option – see above). Your profile picture will be included.

An Announcement showing the tutor’s message and profile picture.

You can edit your message if you need to by clicking on the title and the Edit button. A notification will also be added to the Module Tile.

Support from TEL

If you would like help getting started with Announcements or want to discuss other ways to use Canvas with your students please contact tel@sussex.ac.uk  

Resources from Canvas

Canvas Training

Places are filling up fast on our Canvas Fundamentals training workshops. We strongly encourage all Sussex academic staff to sign up for a place. Attending the workshop will familiarise you with Canvas and your options for teaching with the new VLE. It also gives you access to your migrated modules from 17/18.

Professional Services staff are also welcome to book a place on this workshop, although we are in contact with several School Administrators to arrange specific sessions for School Office staff.

Tagged with: , ,
Posted in Canvas

Apple Clips: A free and easy video editor

This week we want to introduce you to an iOS app that is great for quickly producing short videos for sharing.

What is it?

In Apple’s own words Clips is ‘..an iOS app for making and sharing fun videos with text, special effects, graphics and more’ (https://www.apple.com/uk/clips/). Check out the video below to see it in action.

With a range of animated title and text slides, Clips allows you quickly produce a nice looking video for sharing on social media in very little time. Like with many video tools such as Snapchat, Facebook and Instagram you can add a variety of graphics. You can record a voice over and disregard the video audio, it also lets you import existing videos as well as recording straight from either your front or back camera.

Simple to use, you just hold down the record button for as long as you want that particular element for, you can trim them afterwards.

3 key highlights:

  • Adding music. Clips comes with its own library of ‘Soundtracks’ covering many different genres and themes from pop to playful and holidays & events.
  • Title slides that are very slick and add a touch of professionalism to your video.
  • Automatic transcription that is actually pretty accurate. Just select the style of how the text is displayed on screen, you can edit if it’s missed something. This is great because videos shared on social media are often watched without sound and it makes your video more accessible.

Is it free?

Yes

Will it work on my device?

Clips is compatible with iPhone 5s or later, iPad Pro, iPad (5th generation), iPad Air or later, iPad mini 2 or later, and iPod touch (6th generation) and requires iOS 10.3 or later.

Where can I get the app?

Clips is iOS only and available from the App store for your iPad, iPhone or iPod Touch.

Ideas for using Clips in learning and teaching

  • Create videos using Clips and use them:
    • To follow up on sticky points of seminars or lectures.
    • To send out some questions ahead of a lecture or seminar.
  • Have students create video “explainers” on the topic.
  • Share Clips videos on social media for your module or course or department, such as a Twitter account.

What are the alternatives?

As Clips is iOS only, here are some alternatives for Android phones.

Want more help and info?

Contact Technology Enhanced Learning tel@sussex.ac.uk


Canvas Training

Places are filling up fast on our Canvas Fundamentals training workshops. We strongly encourage all Sussex academic staff to sign up for a place. Attending the workshop will familiarise you with Canvas and your options for teaching with the new VLE. It also gives you access to your migrated modules from 17/18.

Professional Services staff are also welcome to book a place on this workshop.

Tagged with: , , , , ,
Posted in App review

About our blog

We are the Educational Enhancement team at the University of Sussex. We publish posts each week on using technology to support teaching and learning. Read more about us.

Subscribe to the Blog

Enter your email address to receive notifications of new posts by email.

Archive