Canvas ePortfolios

Canvas has a tool called Canvas ePortfolio which allows students to create a series of self contained ePortfolios. Each ePortfolio can be made up of a number of sections, each consisting of pages of content such as text, images, video and other multimedia as well as links to files or resources on the pages.

ePortfolio’s are not tied to a specific Canvas module site but rather are tied to an individual, which means they can be used by students  throughout their University experience and across modules and courses. This is an example of a Canvas ePortfolio page.

Screenshot of a Canvas ePortfolio

ePortfolios can be shared through the use of a unique link, which allows anyone, even those from outside the institution, to access the ePortfolio if the link is shared with them. This makes it very easy to share ePortfolio content broadly if required.

It’s also possible to allow others to comment on an ePortfolio if the correct option is enabled by the ePortfolio’s creator, this means students and instructors can provide comments around ideas and feedback on each other’s ePortfolios.

How could we use the Canvas ePortfolio?

Reflective Journal

If you’d like to encourage students to keep a reflective journal of their learning experience then Canvas ePortfolio can work well for this purpose. Students can create pages for each week or topic they cover, these can then either be kept private and used only by the student or they can be shared with tutors or convenors through the use of the sharing link. This link can even be submitted to a Canvas Assignment if you’d like students to submit them as a non contributory assessment. 

Staff can also use the ePortfolio tool as a reflective journal for CPD purposes around a topic or area or to showcase your work and research.

Weekly assessed ePortfolio 

There is no way to control when students add content to their ePortfolios, this means they are not appropriate for summative/contributory assignments but could be used for formative assignments where students contribute a weekly page to their ePortfolio as they work through their module or course. The student can then allow convenors or tutors  to comment on the pages of their ePortfolio to allow for feedback. 

Student showcase ePortfolio 

Students can use the ePortfolio feature to collect and curate examples of the best work they’ve produced, their submission to assignments can be linked into their ePortfolios and these ePortfolios can be externally shared allowing those from outside the institution to access and view ePortfolios, which could be useful for students looking to showcase their work to external users for any reason.

The contents of an ePortfolio can be exported to a ZIP file, so students can download a copy of their ePortfolio to take with them even after they leave the University.

Other options, resources and support

This  is not an exhaustive list and there may be numerous other ways you can incorporate this tool into your teaching and learning experience. There are also other tools that can work for the purpose of portfolios such as Mahara  and Microsoft OneNote. If you’d like to discuss possibilities and would like any help using the Canvas ePortfolio tool please contact TEL at TEL@sussex.ac.uk

Resources 

Tagged with:
Posted in Canvas

The tech behind the Online Festival of Learning

The Technology Enhanced Learning team has been core to the Active Learning Network from its creation in 2017. The network is a group of educationalists who share an interest in active approaches to learning. We have a growing number of satellite groups emerging in universities through the UK, as well as involvement from India, Cambodia, China and other countries. The ethos of the group can be expressed through John Dewey’s maxim, “Give the pupils something to do, not something to learn”. The nature of the task we ask students to do should demand deep thinking and learning naturally results.

Online Festival of Learning

When the Active Learning Network set up the Online Festival of Learning we had a number of concerns including:

  • How could we make it work when we could not be face-to-face?
  • How could we make it work for people in different time zones?
  • How could we make it feel like a festival and avoid it feeling like a conference?

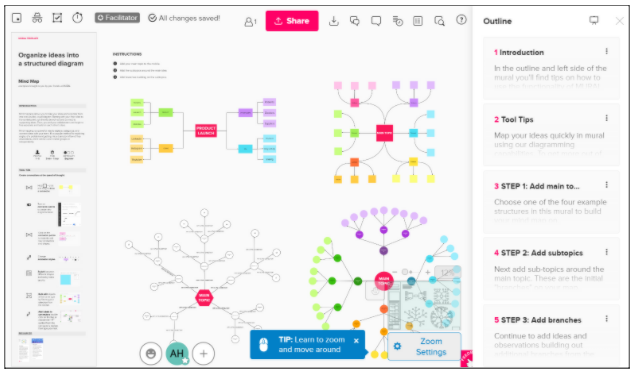
One important factor was that we didn’t have a budget, we didn’t want to charge people and so everything needed to be done for free. Consequently, core to our efforts would be the technologies that we put in place to support the festival and these ended up being: FlipGrid, Google apps, Zoom and Wonder.me.

Submissions

In order for potential session facilitators to propose submissions we created a Google form, which invited people to fill in the relevant information. We recommended formats such as Campfire (storytelling with an opportunity for participants to tell their own stories), Birds of a Feather (sessions without a pre-planned agenda designed to encourage discussion and networking), Solution Rooms (designed to provide peer-supported advice on individuals’ problems) and Hyde Park Corner Debates (a central theme or question where two speakers debate for and against). Once the potential session facilitators had submitted their proposals we reviewed each of them and fed back further ideas of how their session could fit the festival theme and ethos using a shared Google Slide deck.

Festival Itinerary

We put together the festival itinerary bearing in mind that some of the participants might not be in the UK and might be in timezones ahead of us or behind us. The festival lasted a week and we had 9am morning and 5pm evening slots. These times would allow participants from outside the UK to come to at least a morning or evening session each day and participants in the UK could have a full day’s work and be able to relax into our sessions without competing work distractions. We used the Google Slide deck where we had given facilitators feedback to construct the itinerary. It was versatile enough to enable facilitators to respond to reviewers’ questions, add photos and so on. This was a big time saver and provided us with an inclusive and colourful itinerary to be shared with participants. It was also navigable and was easy to find when sessions were and what they were about. 

Introductions

Given the festival was at either end of the day for people from all over the world to join, it didn’t make sense to have just one slot for introductions so in the spirit of blended learning and flipped classrooms we used an asynchronous introduction space on FlipGrid. The organising committee all made three videos of themselves, one introducing themselves, a second saying what they were excited about and a final one recommending a festival theme song. All festival participants were invited to do the same.

Zoom sessions

In order to deliver the festival activities we used the Zoom platform. The most sessions we ran concurrently was three so we set up three zoom meetings, with no set time and reused them. That made it easy for us to administrate and easy for participants to join. To give it a festival feel we gave each of the three meetings the name of a tent.

Collaborative writing

In the spirit of multiple forms of delivery, we wanted to include a collaborative writing platform and offered participants the opportunity to contribute to our collaborative book by adding a hundred word summary of a short idea for putting active learning into practice. A number of the sessions introduced the idea of collaborative writing and participants were regularly offered the opportunity to submit their ideas.

After hours socials and Festival Spirit Circle

Each evening at the end of the afternoon session we had an after hours social using the wonder.me app. This is a visual app that allows groups of people to easily meet and talk in groups. We closed the week with a festival of learning spirit learning where we all shared what we had got from the festival. We had a shared Google Spreadsheet where we shared thoughts and musings.

Summary

The festival of learning was a great success and a great ambassador for, and example of, active learning. We utilised a number of free services to put on an event which was enjoyed by over 300 participants over the week. It was a different sort of event where we all learned a little more about the importance of fun and innovation in teaching for deep and meaningful learning.

Posted in Active learning

The top TEL blog posts in 2020/21

It’s been a year (plus) like no other, but now the academic year is ending there’s a chance for some reflection. I was interested to see whether the number of views of posts on the TEL blog could tell us anything about what has been interesting to our readers in 2020/21 – and to give you the chance to see any you missed. Here are the ten most viewed posts in the year to June 2021.

Zoom

Not surprisingly Zoom for online teaching has been well-read. It was published in April 2020 as we adopted the platform for synchronous online teaching. That first post about Zoom at Sussex was followed up with more on the topic throughout the year including:

Zoom was also mentioned in the recent post on Poster presentations online which shows just how versatile the platform can be. We have seen it used for all sorts of interactions including one-to-one ‘office hours’, student presentations, seminars, tutorials, staff meetings and live lectures.

Padlet

Padlet was popular before the pandemic and its use at Sussex has grown in the last year. Three Padlet posts made it into the top ten for 20/21. 4 fantastic uses for Padlet in online teaching offered some great ideas for using the platform and Padlet maps and timelines introduced the most recent additions to the range of formats. Even the 3 year old Padlet for collaborative learning post got a lot of views this year. 

The versatility of Padlet makes it a great platform for many types of online learning activities including collaborative ideas-generation, concept mapping and sharing resources. Sussex teaching staff can request to be added to the University’s Padlet Backpack account by emailing tel@sussex.ac.uk.  

Accessibility

It is good to see that people are thinking about digital accessibility topics with two posts on the topic making it into the list.

It has been more important than ever to think about digital accessibility at a time when so much interaction is happening online, but this was a topic at the top of our list of priorities anyway. We already had our Digital Accessibility toolkit and were publishing a series of ‘Accessibility Tips’ blog posts when the university moved teaching online. These looked at:

Greatest Hits

Our most popular posts of all time (well, since this blog began in 2014) continue to be 5 Tips for Multimedia Enhanced Teaching and Learning and InShot – A video editor for Android and iOS. These both continued their popularity this year as did the post that brought us our highest ever daily views – 5 Myths and misconceptions in learning theory.

It was interesting to see that one of our very first posts made it into the 2020/21 Top Ten. Using Creative Commons images in presentations addressed a topic that has been returned to several times over the years as tools change. More recently we have blogged about Free images to use in presentations and Canvas and Multimedia Creative Commons which provide up-to-date advice on finding images to use in teaching and learning. 

What next?

I wonder what 2021/22 will bring. We will be looking to blog about the things that will interest and help our readers both within the University of Sussex and the wider Learning Technology community. If you have any ideas for technology enhanced learning topics you would like us to cover please email us at tel@sussex.ac.uk

Tagged with: , , ,
Posted in Technology Enhanced Learning

Using Microsoft Translator

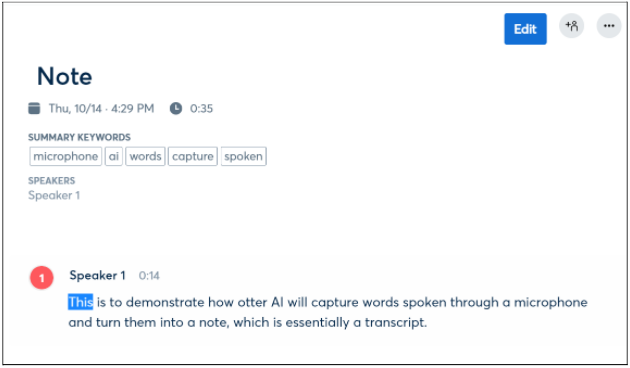
Over the last few years closed captioning has come on in leaps and bounds; Zoom’s built-in closed captioning service can provide instant, accurate captions that are useful for students and staff alike. Whilst closed captioning is helpful for providing a speech to text service, from, what if we could translate these closed captions into different languages? That’s where Microsoft Translator comes in.

Created as a ‘Garage’ project, an initiative Microsoft implemented so that their staff could get some funding for their own, off topic ideas, Microsoft Translator started as a small idea and has recently hit the mainstream market.

Microsoft Translator is a free service which transcribes text to audio and changes the output into a multitude of languages, instantly and accurately.

Imagine you are presenting a PowerPoint presentation, over Zoom, in English, while a student in Greece is seeing the presentation transcribed in Greek, a Norwegian student is listening to the same presentation, enjoying the instant Norwegian captions, and a Chinese speaking student is watching the same video, taking notes from instant Chinese captioning. One presentation audio but multiple closed captioning languages. Sounds good right?

Getting started with Microsoft Translator

 So how do we go about getting it all set up? Thankfully, it’s a super simple setup. Head over to the Microsoft Translator website and choose ‘Start the conversation’.

A screenshot of the Microsoft Translate homepage

Choose your name, language you will be speaking in, and tick the ‘I am using the product in a classroom’ checkbox. You should then be taken through to your conversation homepage.

You’ll notice a few features similar to other pieces of software, for example at the top of the page you can see the ‘Conversation Code’. This is the code you give to the participants in your presentation so they can join and receive the translations. On the right of the screen is a handy QR code which you can ask participants to scan so they can join the session.

When participants are ready to join, either by using the QR code or by going to Microsoft Translator and entering the conversation code. They will be met by the screen shown below. It is important that on this screen, they choose the language they would like to display the text in.

screenshot of login page for participants

Now, when you speak into the microphone, you will see the transcript of what you are saying and the participant will see this translated, real time, in the language of their choice.

Translator can work with numerous languages, including Arabic, Chinese, Italian and French, with surprisingly good accuracy. Perfect for lectures, seminars, or even online meetings.

Participants within your meetings or lectures can now view the live transcript in their own language alongside their video call software.

Microsoft have created a great piece of software, breaking down translation barriers and making it available to everyone. The software can be accessed in your browser, so you don’t have to download anything in order for it to work.

More options and information

Microsoft Translator can be downloaded as an app, if participants want to look at the translations on a mobile device, keeping their computer screen free for notetaking or research.

You might also like the live subtitles option in PowerPoint that was recently highlighted on the IT Services blog.

Microsoft Translator has a built-in, basic audio translate feature, although it comes with fewer languages, that can provide text to speech in your chosen language, providing more accessibility options for you and your participants. For example, you can be on campus, speaking in Chinese and a participant in India can have you translated and voiced in Arabic instantly.

And for the more adventurous, it even translates into Klingon, if that is your thing of course.

You can learn more on the Microsoft Translator website.

Tagged with: ,
Posted in Accessibility, Apps and tools

Getting your Canvas modules ready for a new academic year

Summer is coming and thoughts in the Technology Enhanced Learning (TEL) team are turning to the next academic year. Many staff will be involved in assessment and marking for a while yet, but for anyone who is itching to start setting up their Canvas modules for 2021/22 the empty sites are now available.

Where are my 2021/22 Canvas modules?

Depending on how many modules are currently showing on your Canvas Dashboard you may see the new sites there, listed under ‘Unpublished modules’, or you may need to look in ‘Modules’ and ‘All modules’.

To show modules on your Dashboard, click the star icon next to each in the ‘All modules’ list. Your Dashboard can show up to 20 module cards. 

If you aren’t seeing all the modules you are expecting, please check in Sussex Direct that you are listed with a teaching or assessment role on the module and contact your School Office if anything needs to be updated. 

What do I need to do to get modules ready for students?

TEL have created a set of guidance pages and resources tailored to each School. If you are the module convenor, have a look at Step 1 on the Canvas Module Set Up page and click through to your School’s page. Once you have applied the relevant template and imported any content you want to, steps 2-4 will take you through the other things you need to consider and check. Step 5 shows you how to publish your module. 

Top tips

  1. Make your Dashboard work for you. You can edit your Dashboard to show/hide the module cards you want and arrange the ones you use most frequently at the top.
gif showing moving module crd on dashbaord
  1. Make it easy to correct mistakes. If you are editing Pages it’s a good idea to save often. Each time you save, Canvas will retain a copy of that version so if you make a mistake you can then use the ‘Page history’ to revert to a previous version. 
  2. Tidy up your Files and Pages. This is a good time to do some housekeeping on your module. When you are importing content from a previous year you can leave behind any redundant files and pages to avoid cluttering up your new site. If you have files you think you may need at some point in the future, but not this year, download them and save them in Box or OneDrive.
  3. Think accessibility! Use the Digital Accessibility toolkit to help you make your content accessible. 
  4. Banish broken links. Before you publish your site, use the Link Validator to check if there are any broken web links in your site. This will also highlight any places where students are being directed to another Canvas site that they might not be able to access. If your template has support links to Sussex Direct these will show as inaccessible in the validator because they are behind a login, but the links will work for students.
  5. Publish, publish, publish. To ensure that students will be able to see what you want them to, check that items, units and the whole module are published. A published Page in an unpublished Unit won’t be visible to students.
  6. Check what students will see. Each Page in Canvas has a ‘student view’ button at the top right, that will let you see what an imaginary student would see on that page. This is a great way to check that things are as they should be. It isn’t definitive for items that are specific to individual students, such as assignments, but is a great way to check things before publishing and if you have forgotten to publish a unit (see 6) this will be flagged up in ‘student view’.

Further support

TEL will be providing support throughout the summer to help you get your modules ready for September. There will be a mix of School-based workshops, live Q&As, one-to-one sessions and of course email support via tel@sussex.ac.uk.

Posted in Canvas

Global Accessibility Awareness Day #GAAD

Thursday 20th May 2021 sees the 10th Annual Global Accessibility Awareness Day (GAAD). GAAD is an international event aimed at focusing attention on digital accessibility and inclusion.

Digital accessibility presents a huge challenge for students with disabilities. A recent report from WebAIM showed that 97% of the top one million homepages on the web do not meet the recommended industry standard for accessibility, WCAG 2.1 AA

Since September 2018 it has been a legal requirement that public sector bodies including Universities meet the WCAG standard for web content. In June this year that requirement is extended to cover mobile applications as well. 

Here at University of Sussex around 20% of our student body have registered disabilities, from physical disabilities to specific learning differences such as dyslexia, and mental health conditions. Addressing this need is core to providing an excellent student experience for all.

Over recent years Technology Enhanced Learning (TEL) and many other areas of the University of Sussex have been working hard to support staff in making their content accessible.

This reflects only a small part of the work going on to ensure we provide an inclusive digital space for students.

Many organisations are putting on open events in support of GAAD and you can find a list of many of these on the GAAD website. Sussex TEL are getting involved and we have teamed-up with our counterparts at Brighton University to offer our own event. On GAAD itself (20th May) we are excited to present a keynote talk from Dr Kevin Merry of De Montfort University (DMU). Dr Merry is an expert in Universal Design for Learning, an approach that he helped to introduce at DMU five years ago.

Dr Kevin Merry of De Montfort University (DMU).

Dr Merry will be presenting his online keynote, ‘Institution-wide approaches to embedding accessibility’, on Thursday at 3pm. The event is open to all staff and students at University of Sussex and the University of Brighton.  Please sign-up via eventbrite.

We encourage you to follow and to tweet about GAAD with the #GAAD.
If you have questions about how to make your modules accessible, please do get in touch via tel@sussex.ac.uk.

Tagged with: ,
Posted in Accessibility

Poster presentations online

Over the last year many activities that would previously have been run in rooms on campus have moved online. One such activity is the poster presentation. In this post I’ll explore how tutors can adapt this activity for online, gaining some of the benefits of the web environment.

The aim of a poster presentation is to provide an opportunity for students to synthesise and  communicate their understanding of a topic. Typically an offline poster session would also provide opportunities for questions and discussion about the topics presented, encouraging students to think more deeply. Poster presentations are also used widely in conferences and research. There are some downsides to offline poster presentations however, particularly in terms of inclusivity. Printed posters are a visual medium and without someone present to explain what is there, may be quite inaccessible to students with visual impairments. They are also tied to a physical space which again may exclude students unable to access that space.

To consider how poster presentations can be done online I’ll break the process down into three parts.

Creating the poster

A simple first choice is for students to create a poster using PowerPoint. It is familiar to many and used widely outside of HE, so a good transferable skill. University of Sussex have a licence allowing all students to use Office 365, including PowerPoint. Microsoft have worked a lot on making their software more accessible over recent years and with the immersive reader built-in the posters can be quite accessible. To maximise accessibility I would recommend students keep their posters in PowerPoint format rather than saving to PDF.

If PowerPoint doesn’t fit your requirements, you could consider alternatives such as MS Sway or Adobe Spark, both of which allow you to create simple, attractive web pages which can be shared. Students should be able to access either of these services using their University of Sussex Login.

There are many more options for creating a poster or webpage. You could even set basic criteria for what the presentation should include and leave students open to choose. Please note you may need to set some limitations if this is an assessed activity and make sure you specify that students provide their posters in a format you can access. Do contact TEL if you have questions.

One final point on accessibility. The visual design of the poster may still be an issue for some students. You could consider making this a group activity, allowing sighted students to support those with visual impairments.

Putting it on display

A great option for displaying the posters is Padlet. Padlet will allow each student to submit a file of up to 250mb in size or add a link to a web page. If students upload PowerPoint files, these can be previewed in a web browser but could also be downloaded if required. The Padlet posts are displayed tiled on a web page, making it easy to scroll through and view each poster.

A Padlet webpage containing three posters displayed in a row as thumbnail images. the first is a PowerPoint slide, the second is a link to a MS Sway webpage and the third is an Adobe Spark webpage.
An example poster presentation page using Padlet.

If this is a contributory exercise, you might consider using a graded discussion in Canvas. While this might not be as visually appealing as Padlet it is simple to create and to grade. Students can upload their PowerPoints or add links to their Poster pages in the discussion. As with Padlet, PowerPoints can be previewed in a web browser. Once students have made their posts you can view and mark a summary of each student’s contributions via the Canvas Speedgrader tool.

To provide a more human element and make the activity more inclusive, in addition to the poster itself you might ask students to record a short verbal explanation. This might be added as a short narration to the PowerPoint slide or both Padlet and Canvas discussions offer the ability to record a short video.

Allowing for discussion 

The final part of the process is to allow for students to discuss and question each other about their posters.

Padlet will allow students to post comments and add reactions such as ‘heart’ or thumbs up/thumbs down to the Posters. Canvas discussion forums as their name suggests will also allow students to post questions and comments in reply to their peers’ displays. 

Asynchronous discussion such as that suggested above, run over a day or week is a flexible and relatively accessible way to manage this element of the activity but may not provide the immediacy of an in-class poster session. If you prefer a live experience, Zoom offers the ability for attendees to choose a breakout room to visit. You could set up a Zoom meeting with a separate room for each poster. Zoom supports up to 50 rooms though I would not recommend having this many! Students could then move to a room of their choice and discuss with the presenter.

There are many options for delivering an activity like this and if you have your own suggestion you’d like to share, we’d love to hear about it.
If you would like to run an online poster presentation, or have other questions about delivering teaching online, get in touch with us via tel@sussex.ac.uk.

Tagged with: ,
Posted in Accessibility, Blended learning, Learning Design, Technology Enhanced Learning, Uncategorized

Polling with Zoom

Have you ever wanted to pose multiple choice questions to your students during a Zoom meeting? You can do this with Zoom’s inbuilt polling option which allows you to create single or multiple choice polling questions and then pose them to everyone in a Zoom meeting. You can then view and even download a report of the students’ responses.

What’s a Zoom poll?

Each poll consists of up to 10 single choice or multiple choice questions and each question can have up to 10 potential answers. You can create up to 25 polls per Zoom meeting. Zoom polls do not have all the features of a dedicated polling platform like Poll Everywhere, but they allow you to ask questions within Zoom easily.

Why would I want to use a Zoom poll?

There are a number of reasons that a Zoom poll can be a useful addition to your teaching sessions: 

  • Engagement. It can be hard to concentrate on and engage with someone speaking for long periods of time. A good way to break up periods of talking can be to include a short activity allowing learners to engage and think about what they are learning. A quick poll can be a great way to wake everyone up and allow them to interact and be active rather than passive learners. 
  • Identify knowledge gaps and comprehension. You can use Zoom polls as an informal formative assessment within a session by polling students with a few multiple choice questions based on the topic they’ve learnt. Their answers can help you to identify their comprehension of the topic and any knowledge gaps they may have, you can then use this information to tailor the rest of your session by focusing on where students are weakest. 
  • Surveying. Polls can work well for surveying your class quickly, for example letting the class decide as a group which topic to focus on next in a session from a list of options, or getting their opinion on a topic i.e. ‘Do you agree with statement A? Yes or No’ .You can even use a poll for feedback on how they feel the session is going or to ask if they’d like a break.

How do I create a Zoom poll?

Some key things first, we recommend that you set up the Zoom polls ahead of the session itself rather than during the meeting. 

So with that in mind first go to the Zoom web interface at  https://universityofsussex.zoom.us/ and log on. After you’ve logged on, ensure you select Meetings in the side menu to be shown a list of all the Zoom meetings you’ve created, then find the relevant Zoom meeting where you wish to add a Poll and click on the meeting name.

You’ll now be on the meeting information screen. Scroll down to the bottom to find a section named Poll and below that you’ll find an Add button, select this to add a poll.

screenshot showing 'Add' button

You’ll then be presented with the poll creation screen, from where you’ve got a few different aspects to consider.

  1. This is where you can put a title for your poll to identify it.
  2. Choose if you’d like the results to be anonymous or identifiable.
  3. This is where you can write your questions and answers. You can choose to make them single or multiple choice and you can have up to 10 potential answers per question, though ideally you would not want more than 5.
  4. Click the Add a question option to add another question to the poll. You can have up to 10 questions per poll.
Numbered screenshot showing where to enter title, set anonymity and add questions

Once you’ve added your questions click Save to save the poll. You can add multiple polls to the same meeting by repeating this process 

How do I run a Zoom poll?

Once you’ve created your poll, you can run it during a meeting by clicking the Polls option from the Zoom toolbar. 

screenshot of zoom meeting controls showing Polls button

You can then run your poll by selecting the Launch Polling option.

screenshot showing 'Launch Polling' button

You’ll then be able to see students’ real time responses to the questions as well as a tally of how many have voted. It’s worth noting that students themselves won’t be able to see others responses at this stage. Whenever you’d like to conclude the poll select the End Polling button.

screenshot showing 'End Polling' button

You’ll then be shown the final responses and can choose to either keep this private or share it with everyone else in the meeting by selecting Share Results. 

screenshot showing 'Share Results' button

Those are the basics of running a Zoom poll, for more in-depth guidance please see Zoom’s guidance on Polls. 

Hopefully this has been a useful introduction to a new tool for you to try out in your next Zoom session. Why not give Polls a try? If you’d like any help setting up your Poll or have any questions then please get in contact with TEL at TEL@sussex.ac.uk 

Tagged with: , ,
Posted in Polling tools

About our blog

We are the Educational Enhancement team at the University of Sussex. We publish posts each fortnight about the use of technology to support teaching and learning. Read more about us.

Subscribe to the Blog

Enter your email address to receive notifications of new posts by email.

Archive